Showing posts with label present. Show all posts

Wednesday, 24 December 2014

Can I finish it? Lots of Hearts

I am trying to get this quilt finished by Christmas.  And it's Christmas Eve today, so we shall see!

This isn't actually a Christmas present, but a wedding present for my rather grown-up little sister who got married last May.  I fairly obviously missed their wedding as the deadline for completing it, but they are coming to stay with us for Christmas and I'd love to be able to give it to them then.


The pattern for the quilt is a slightly doctored version of Oh Frannson's Love Triangle Quilt.  My sister asked for a king size quilt, which should have been sixteen blocks arranged in a 4 x 4 pattern.  Each block involves 91 little triangles to be sewn together, so the full king size was going to be a huge job.  I did cut out all of the triangles, but about half way through the tenth block I just hit a wall, and couldn't face sewing any more of those little beasts together.  Instead, I joined my nine completed blocks into a 3 x 3 pattern, and added two six inch borders around the edge to make a king size quilt.  I may use some of the leftover triangles to make a cushion to go with the quilt - when I've recovered from making this that is.


I went really scrappy with the design, with almost 30 different fabrics, most of which had fairly bold patterns.  This means that the nine main blocks have turned out pretty loud, and the last minute borders around the outside have worked really well in the end to calm the quilt down a bit and give the eye somewhere to rest.


I'm doing a few different quilting patterns; it's the first time I've got my free motion foot out in a good long while as I'm not very comfortable with it, but that'll only come with practise so I figured that I had to brave it sometime!  I am mixing the free motion up with a bit of my conventional walking-foot-straight-line-quilting.  I am just doing this on a domestic sewing machine - it's the second king size quilt I've done on it, and while it can be a bit unwieldy when you're stitching in the middle of the quilt I've generally found it easily doable to quilt something of this size on a normal machine.


With a bit of luck and a fair wind, I'll be back soon to share the finished job!

Linking up to Let's Bee Social and WIP Wednesday.

Friday, 12 December 2014

Emily's Quilt Finished!

I finished this quilt a couple of weeks ago but, being a Christmas present for a gorgeous little girl, had to wait until I'd given it until I could share it.  So here it is: Emily's Quilt!


I wanted this to be a definitely girly quilt, but not too pink and fluffy.  The recipient is only fifteen months old, so who knows what colours she will like!  The ladies at my local fabric shop, Coles, were very helpful (and patient!) pulling bolts of fabric out to help me find the right background fabric to go with the selection of fat quarters I'd pulled from the racks.  In the end I went for a dashwood studios cream polkadot fabric for the background, which brought the mixture of accent fabrics together well.


My plan was to keep the design for this quilt fairly simple.  I used six patterned fat quarters, and 1.5m of the cream polkadot background fabric, cutting them into 6.5 inch squares (to be 6 inches finished), and laying them out alternately in a 9x11 grid.


For five of the squares towards the bottom left, I replaced the simple square blocks with Emily's name.  This was my first attempt at piecing letters - I spent a long while figuring out how to do it, and I'm so pleased with the result.  It's now inspired me to try making a whole alphabet quilt, I just need to find the right fabric...


I pieced the backing from some big flowery fabric from my stash (I love it!), and quilted it with orange peel quilting in the same way I quilted my wall hanging.  I finished it off by binding in a deep purple fabric.  The finished quilt is around 54" x 66", a nice size for snuggling.

Linking up to Crazymomquilts, and Confessions of a Fabric Addict.


Friday, 28 November 2014

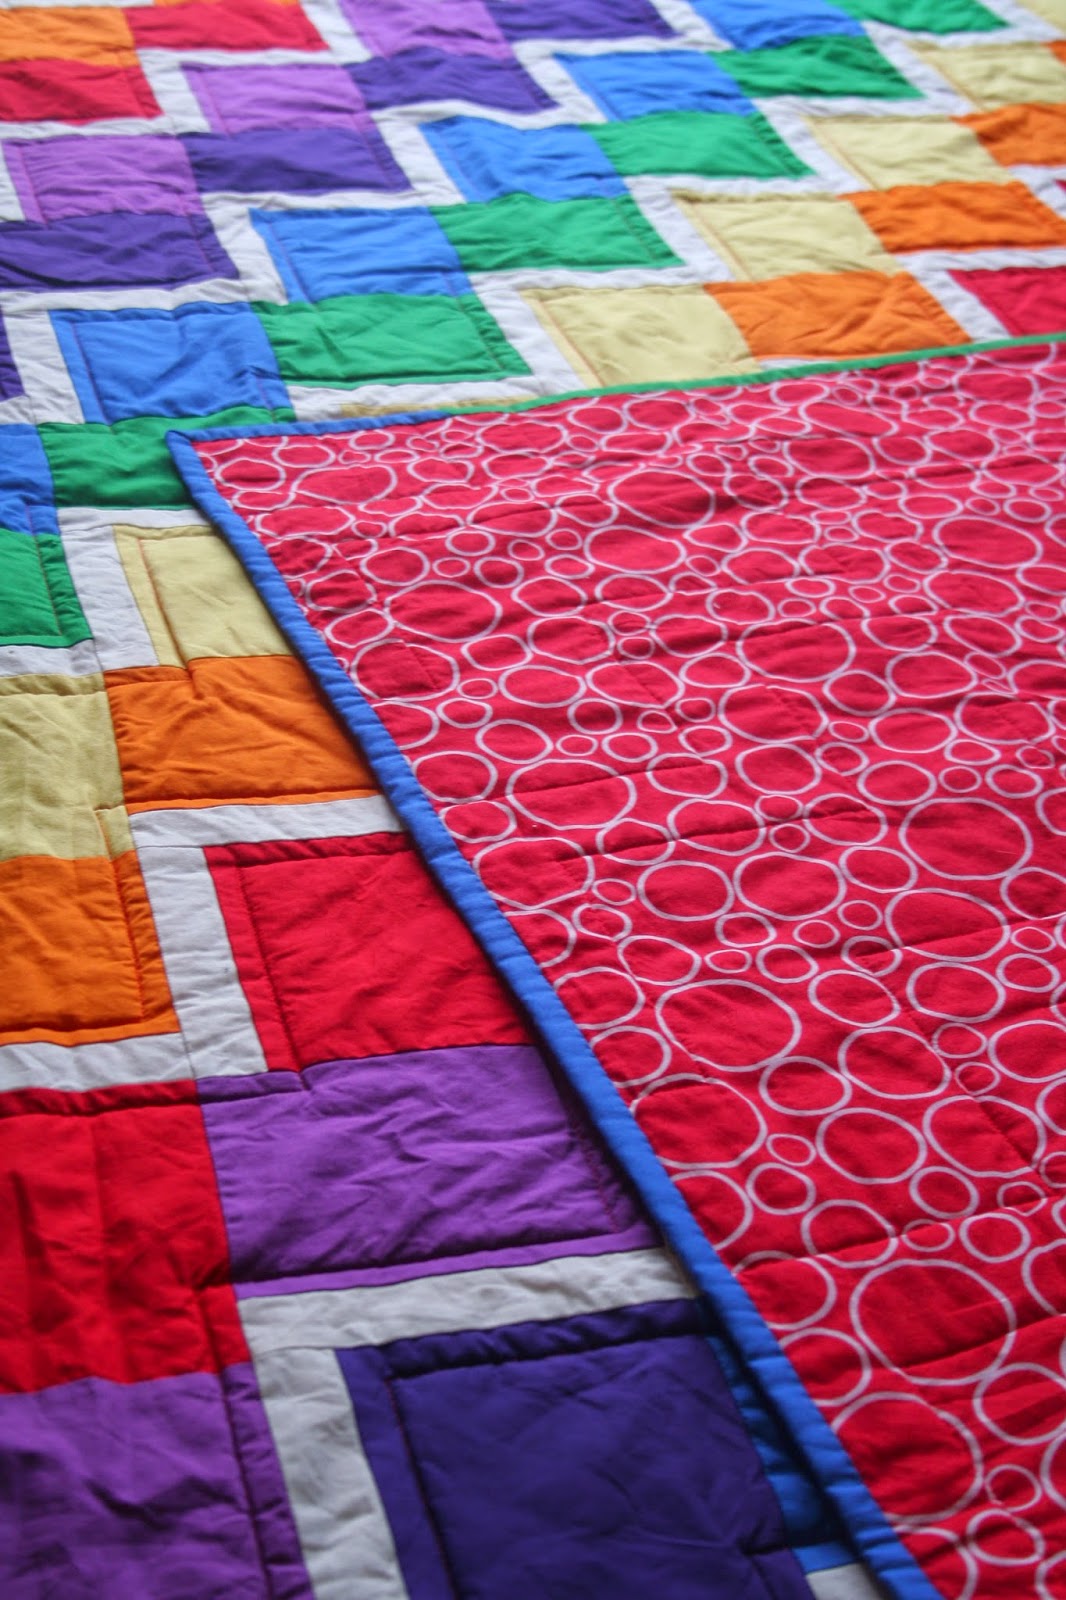
Rainbow Quilt DONE!

It's done it's done, my rainbow quilt is done!


I am so pleased with how this has turned out!  It's a bit wrinkly at the moment as I left it in the tumble dryer slightly long and the creases set, but they'll come out next time it gets washed (which, given it's my son's quilt I'm sure won't be long).


I quilted it in zig-zags, and have bound it in scraps of the green, blue, indigo and violet fabric.


This was going to be one of his Christmas presents, but I've already got him a few other presents and he's too little to really understand the idea of Christmas anyway, so I've decided to give it to him early.  I think a few games of hide and seek and a bit of tent building will be the order of the day!

Linking up to Crazymomquilts, Confessions of a Fabric AddictFreedom Fridays and TGIFF.

Friday, 21 November 2014

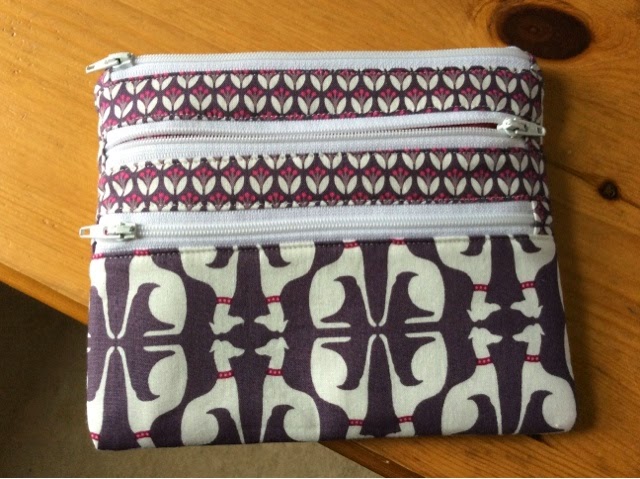
Triple zip purse finished!

I am so excited by this purse!

I love making purses, and my sister loves anything with lots of zips, so when I saw the tutorial for this over at A Quilter's Table I knew who I was making it for.  It would have been a Christmas present if I could have hung onto it for that long, but it was too fun so I popped it in the post to her right away.


When I was visiting my sister a few weeks ago we went into her local fabric shop and she fell in love with this gorgeous dog fabric, so I whipped back to get some, along with the purple accent fabric.  The pockets are lined in a pink polka dot fabric I had in my stash.


I found the tutorial in general really good and easy to understand.  I did end up doing the final steps slightly differently as I found the tutorial method a bit fiddly.  Also, because I was concerned that my zips hadn't all gone in totally in line with one another, I used a slightly bigger seam allowance on the side seams to ensure I caught everything.  As best I can explain, what I did was:
  • Once you have attached all of the zips, and it's just the sides of the pouch that need closing up, rather than turning the pouch through as described in the tutorial I OPENED THE TOP ZIP (it's a pain if you forget to do this - experience speaks), lifted up the biggest pocket, pressed the rest flat, and stitched from the bottom of the pouch upwards on both sides up to where it met the biggest pocket.  You are just stitching through the main body and the two smaller pockets, not through the biggest pocket.
  • I then stitched the two sides of the biggest pocket, leaving a gap for turning on one side.  You need to be careful to lay the pocket down how it will lie in the finished pouch, not just pull it out at right angles, and you won't be able to stitch right up to the top of the pocket.
  • Then, I stitched down from the top of the pouch, through all of the layers, until my stitching joined up with the main pocket stitching from the previous step.
  • It should now be possible to turn your pouch the right side out through the gap you left in the side of the biggest pocket and the open top zip (see why that was so important?!), iron it all out and stitch the hole in the pocket up.

Overall I'm really pleased with the result.  It has pulled a bit tight across the back because of the bulk of all of the zips on the front, but that doesn't seem to be affecting the way it works so I don't think it'll matter.  You may notice that the top zip is on the front of the pouch rather than directly across the top as well - that's just to do with me lining it up like that when sewing up the sides because I didn't look at the photos properly.

I'm linking this up with crazymomquilts finish it up Friday!

Sunday, 2 November 2014

Rainbow Quilt in progress

I'm currently working on my rainbow quilt.  This one is destined to be a Christmas present, but as it's for my 14 month old son who is unlikely to stumble across this post, I feel safe sharing it.


This is the first quilt that I've made using solids, and I've really enjoyed the novelty of the big bold blocks of colour.  I used kona solids for the fabric, and they are gorgeous, vibrant colours (when it's finished I will take a photo in the daylight to show the colours off better) and the fabric has a lovely weighty feel.  I bought the fabric from plush addict (here) where they do a rainbow fat quarter bundle, which pretty much solved my fabric selection!


My original plan was to make each of the zig zag stripes in a single colour, but when I was laying it out it just didn't look right, and after a lot of playing around I combined two colours per zig zag stripe.  I got the idea for the zig zag stripe layout using two tone blocks from Amanda Jean over at crazymomquilts.  It's a neat technique to form zig zags without the need for half square triangles!  Each block measures 5.5 inches finished: 4.5 inches of colour and a 1 inch white stripe (the white is kona snow).


I'm currently quilting it fairly simply, sewing lines about half an inch away from the white stripes on each side.  I'm using red thread for this so that it shows up on most of the squares, a bit like top stitching.  I don't tend to quilt very heavily as I like the look of widely spaced lines (and also I'm also a bit impatient and don't want to spend days doing it).

I finished piecing this quilt top over the summer, and when I started quilting it tonight I felt incredibly unmotivated.  I think the novelty of it had worn off and it just felt like drudge work to get it finished.  After I'd been working for a little while though (with the aid of a few episodes of The West Wing), I really started to get into it and I'm falling back in love with the rainbows.  I just hope my little man likes it - it will certainly be good for playing hide and seek under!