I am so excited by this purse!
I love making purses, and my sister loves anything with lots of zips, so when I saw the tutorial for this over at A Quilter's Table I knew who I was making it for. It would have been a Christmas present if I could have hung onto it for that long, but it was too fun so I popped it in the post to her right away.
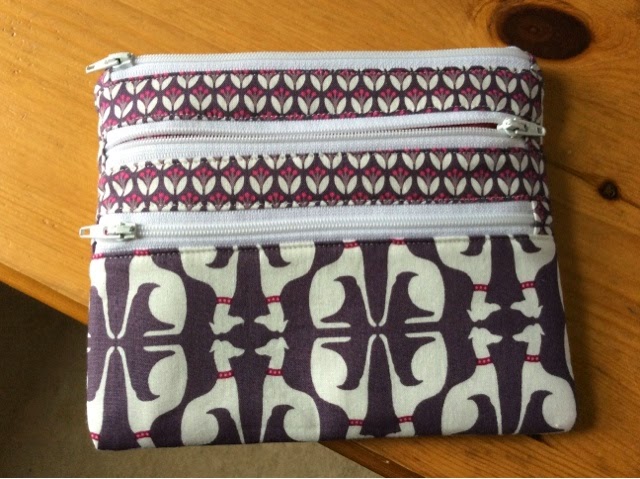
When I was visiting my sister a few weeks ago we went into her local fabric shop and she fell in love with this gorgeous dog fabric, so I whipped back to get some, along with the purple accent fabric. The pockets are lined in a pink polka dot fabric I had in my stash.

I found the tutorial in general really good and easy to understand. I did end up doing the final steps slightly differently as I found the tutorial method a bit fiddly. Also, because I was concerned that my zips hadn't all gone in totally in line with one another, I used a slightly bigger seam allowance on the side seams to ensure I caught everything. As best I can explain, what I did was:
- Once you have attached all of the zips, and it's just the sides of the pouch that need closing up, rather than turning the pouch through as described in the tutorial I OPENED THE TOP ZIP (it's a pain if you forget to do this - experience speaks), lifted up the biggest pocket, pressed the rest flat, and stitched from the bottom of the pouch upwards on both sides up to where it met the biggest pocket. You are just stitching through the main body and the two smaller pockets, not through the biggest pocket.
- I then stitched the two sides of the biggest pocket, leaving a gap for turning on one side. You need to be careful to lay the pocket down how it will lie in the finished pouch, not just pull it out at right angles, and you won't be able to stitch right up to the top of the pocket.
- Then, I stitched down from the top of the pouch, through all of the layers, until my stitching joined up with the main pocket stitching from the previous step.
- It should now be possible to turn your pouch the right side out through the gap you left in the side of the biggest pocket and the open top zip (see why that was so important?!), iron it all out and stitch the hole in the pocket up.

Overall I'm really pleased with the result. It has pulled a bit tight across the back because of the bulk of all of the zips on the front, but that doesn't seem to be affecting the way it works so I don't think it'll matter. You may notice that the top zip is on the front of the pouch rather than directly across the top as well - that's just to do with me lining it up like that when sewing up the sides because I didn't look at the photos properly.
I'm linking this up with crazymomquilts finish it up Friday!
How beautiful! I have seen her tutorial but have not had enough courage to try it yet. Kudos for you!
ReplyDeleteThank you! It was really fun to make :)
DeleteOh my goodness! This project includes two of my favourite things - zips and greyhounds! A perfect combination, great job!
ReplyDeleteThanks! I a have some fabric left over, just got to figure out what else needs to be covered in greyhounds now :) x
ReplyDeleteVery fun! Sorry you found fiddly bits, and looks like you made it work for you. I bet your sis loves it!
ReplyDeleteShe does thanks! I'm so impressed by your vision to be able to put something like this together, it was really fun to make - there will be more in the pipeline I think!
DeleteThis comment has been removed by the author.
ReplyDeleteLovely! And am salivating at that greyhound fabric. Do you know the name of the print or the maker?
ReplyDeleteThank you! Really sorry I don't know the name of the fabric - I'll keep my eyes open in case I see it again!
Delete